Wednesday, March 16, 2011
Pure
Tig-Funkie


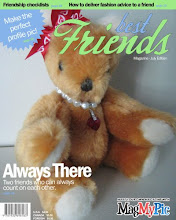
Tig-Funkie, born on 11th March 2011, Friday measuring 17 1/2 inch in length has all disc-jointed for his limbs and a double disc-joint on the neck. He foot pad and paw pad are made from leather and has polyester filling. He is playful and loves to tells jokes if you ever listen to him closely.
Sunday, March 6, 2011
No-Eggs Bananas Chocolate Chips Cake
Another eggless recipe for my girl. This taste great, a bit sweet due to the extra applesauce jam and chocolate but overall the cake is soft and slightly chewy. Love its texture. Infact, it is better then the other banana cake recipe that calls for eggs.

This recipe is from http://www.mydiversekitchen.com/
Have change the recipe abit to suit my taste bud and my girls love this texture better.
Ingredients:
75 gm butter, softened
1/2 cup firmly packed brown sugar
1/4 cup honey or applesauce jam
2 - 3 medium very ripe bananas, mashed or pureed
1/4 cup milk
1/2 tsp vanilla extract
1 1/2 cup all purpose flour
1 1/2 tsp baking powder
1/2 tsp salt
semi-sweet mini chocolate chips
2 extra medium bananas, slice side-ways for decoration on-top of cake
sunflower seeds (optional)
Method:
1. Heat oven to 180 degC and line a square tin with baking paper.
2. Medium bowl: sift flour, baking powder and salt. set aside.
3. Large bowl: Electric Mixer - cream butter, brown sugar and honey or applesauce jam till fluffy and creamy. Add mashed bananas and vanilla extract and beat until smooth.
4. Using Spatula - add in dry ingredients alternating with milk until it is incorporated into the batter.
5. Pour the batter into the prepared tin, top with slices of bananas, sprinkle chocolate chips and sunflower seeds. Bake for 30 mins or until done. A skewer inserted into the cake comes out clean. Cool in the tin for about 5 mins and then unmould the cake to cool further before cutting into squares.
No-Eggs Cranberries Rose Petals Cookies
Made this wonderful and delicious healthy cookies today (actually this is the 2nd time I made this). My younger girl has this diet called Eggless diet because she said it made her put on weight. The cookies are crisp and addictive due to the dried cranberries and they taste and smell like normal cookies. When you bite into them, there is just a tinge of rose taste in them, not over powering because I uses vanilla essence instead of rose essence. This recipe was originally from http://bossacafez.blogspot.com/2010/06/cranberry-rose-cookies.html. I change them abit to suit my taste as we don't like over-powering rose scent. The vanilla essence gives a nice vanilla cookies flavour.

180 gm cake flour
1/4 tsp baking soda
50 gm powdered sugar
100 gm cold unsalted butter
1/4 tsp salt
2 tbsp dried rose buds, petals picked and sepals discarded
1/3 cup dried cranberries, finely chopped
1 tbsp cold milk
1 tsp rose essence or vanilla extract
white chocolate, chopped
Method:
1. Medium bowl: sift flour, baking soda and salt, set aside.
2. Large bowl: Electric mixer - beat together butter and powdered sugar until until creamy. Add in rose essence or vanilla extract.
3. Add dry ingredients to the butter mixture followed by cold water or milk.
4. Using a spatula - fold in rose petals and cranberries + white chocolate until a rough dough is formed.
5. Roll dough into a ball and refrigerate for 20-30 mins.
6. Heat oven to 160 degC and line baking tray with baking paper.
7. Using a cookie cutter, cut out shapes from the dough until all the dough has been used up.
8. Baked cookies for 15 mins at 160 degC and another 10 mins at 110 degC until golden. Cool cookies completely before storing.
Friday, February 18, 2011
Bobbie Bunny

Wednesday, February 16, 2011
Handphone Pouch

Haha....my girl said the froggy too bulging and wanted me to make a flat froggy instead. So, I came up with this one. Looks kind of cute and shape like a blob.

This froggy phone pouch is for my girl's new blackberry phone. she loves anything froggy. so like her.

Inspiration started from froggy, so a bunny pouch was born. This fits my nokia phone loosely and it also fits into my handbag with the bunny head sticking out. Very cute and lovely.
Chocolate Marshmallow Cake


Tuesday, February 1, 2011
Cranberry/Blueberry White Chocolate Cheese Muffins


Sunday, January 23, 2011
Table Fan

- 16 x red rectangular packets for fan
- 16 x red rectangular packets for sticks
- 16 x red rectangular packets for stand
- 1 x red square packets for bird
- 1 x ribbon
- 1 x rubber band
- Lots of staples


Thursday, January 20, 2011
Gold Fish Lantern

- 7 x red rectangular packets
- 2 eyes
- staple and glue
- red thread for hanging and tassel
Instructions:


You will get this: only staple one side for inserting the mouth and fins.

4. Insert the mouth and fins to the body part. Staple to close both the other end of the body. Set aside.

5. For the tails, fold 3x red packets as shown;


Subscribe to:
Posts (Atom)